Start by creating a new standard Java Eclipse Project named CustomerService. It is important that the project be of a Java nature.
The LegStar options are available from the File->New->Other.. ->LegStar dialog or directly from the LegStar menu or toolbar buttons:
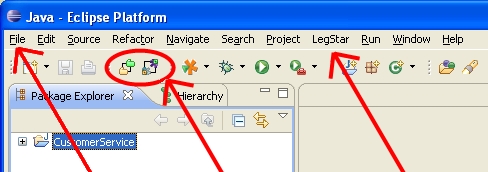
The process starts by translating COBOL Structures to XML Schema. This is option LegStar->New structures mapping…
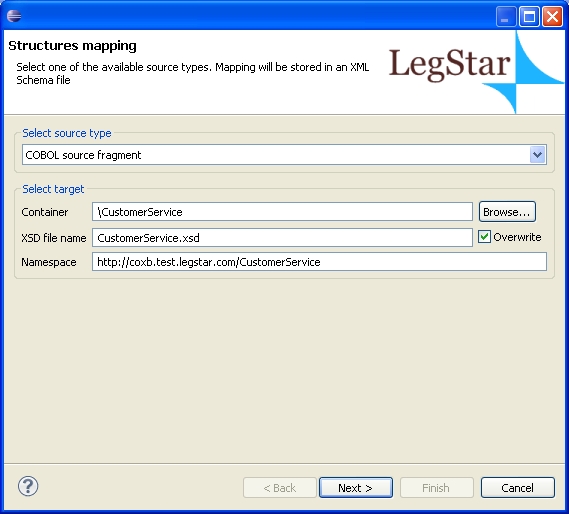
On the Structures Mapping plug-in first page, type an XML Schema file name making sure the extension is xsd. The source type will be COBOL for this use case:
On the next page, you can either paste COBOL code copied from somewhere else or select a file containing COBOL source code from the file system. Make sure this is valid COBOL as the mapping generator is not a full featured COBOL syntax checker:
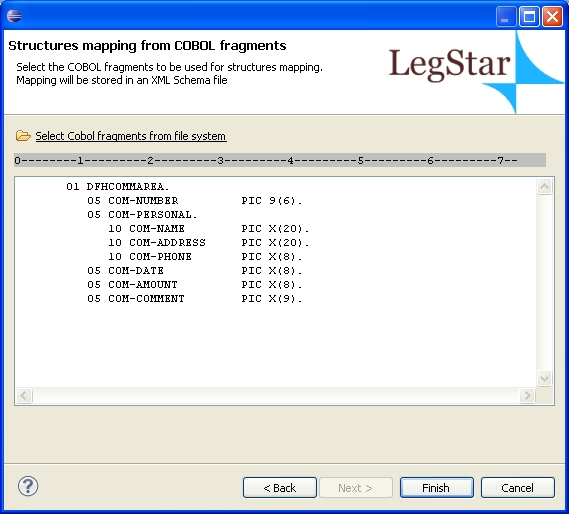
By default, your COBOL code needs to be of a fixed format, between columns 8 and 72. You can change to free format in the Window->Preferences…->LegStar->Structures mapping dialog.
After you click finish, an ant script with a name similar to build-schemagen-CustomerService.xsd.xml is generated and launched. This script generates a new XML Schema and then the Eclipse standard XML Schema editor is opened and you can check the mapping (COBOL annotations) that was automatically generated:
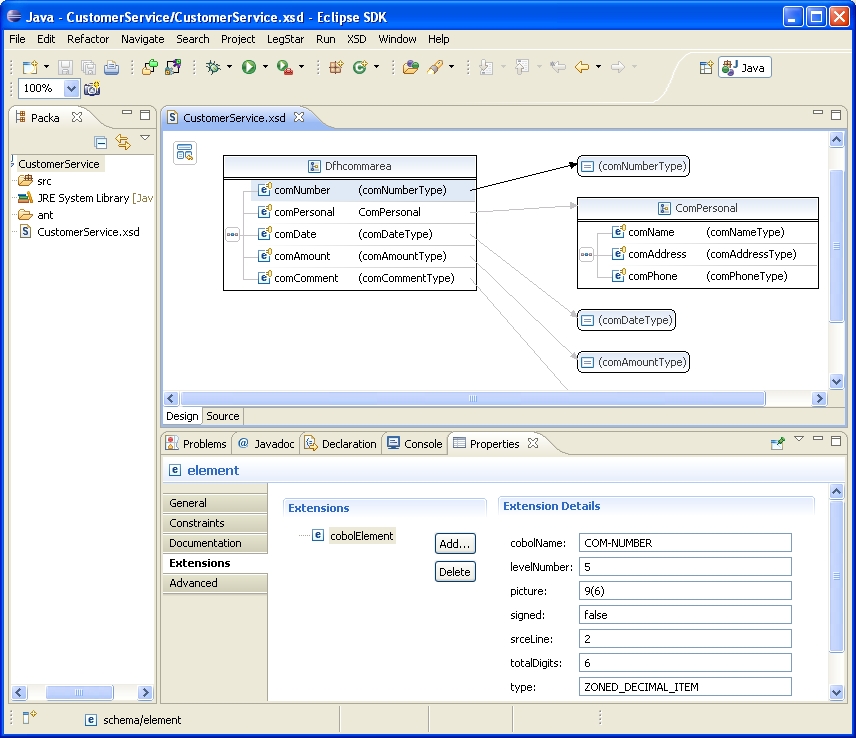
Notice the extensions used to annotate the XML Schema elements with COBOL meta-data.
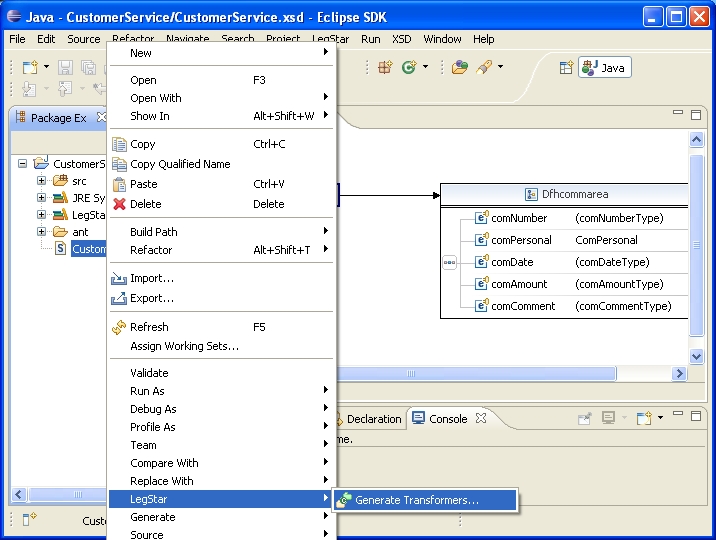
The wizard is started from the package explorer, by right clicking on the previously generated XML Schema:
The next page allows you to specify which elements from the source XML Schema will need to be bound. All elements are displayed here but if you select a parent element, this will automatically select all children for you, so all you need to do is to select root elements:
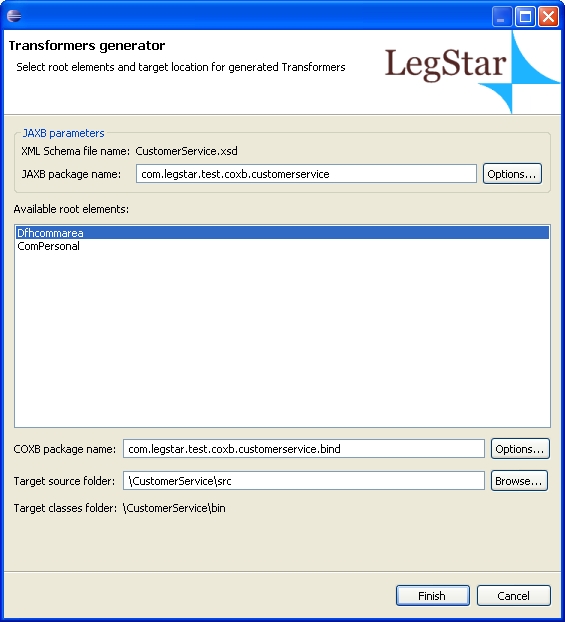
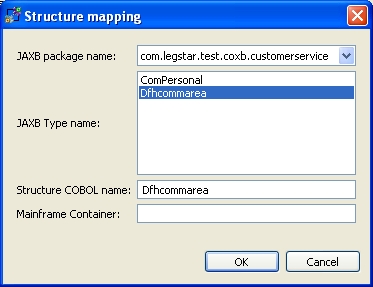
In the Adapter case, the mainframe program expects a Dfhcommarea and also produces a Dfhcommarea so that’s the only element we need to select.
The first options button allows you to customize the JAXB classes that will be generated.
The second options button allows you to specify additional Transformers to be generated such as XML and JSON Transformers.
When you click the finish button, an ant script with a name similar to build-coxb-CustomerService.xsd.xml is generated and launched. There are two different java packages that are generated by the ant script:
-
com.legstar.test.coxb.customerservice contains JAXB classes as generated by Sun’s JAXB XJC utility but with special COBOL annotations as shown on the next screen.
-
com.legstar.test.coxb.customerservice.bind contains the Transformers classes that can be used for fast marshaling/unmarshaling. Using these classes, there is no need for reflection on the JAXB classes to get the COBOL meta-data at runtime.

The Using generated tranformers section gives examples of code you could write to run Transformers.
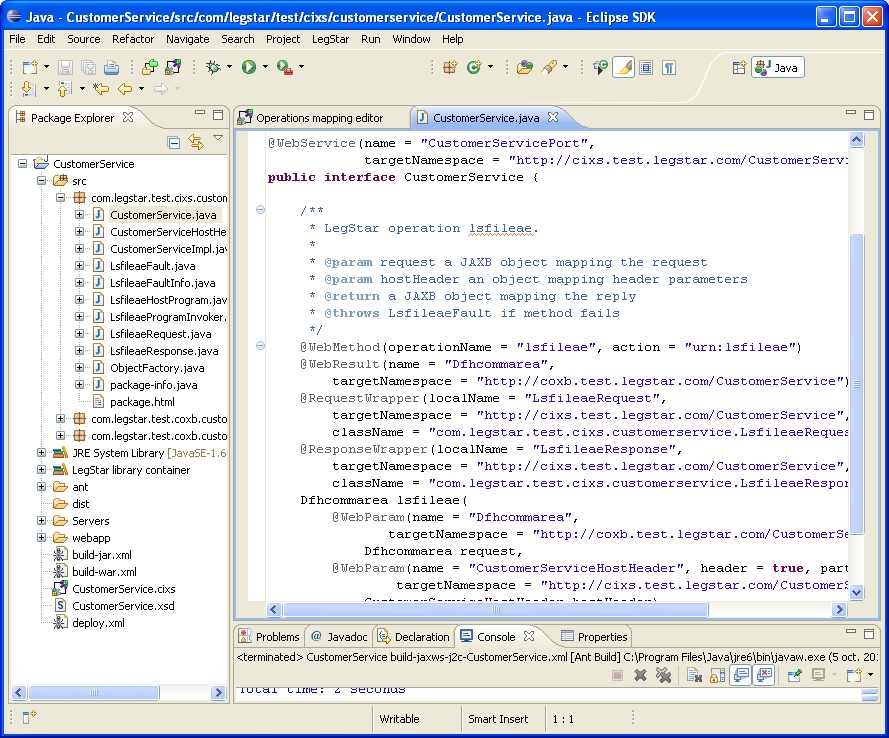
The final step in the process is to generate a Mainframe Adapter, which is a JAX-WS Endpoint.
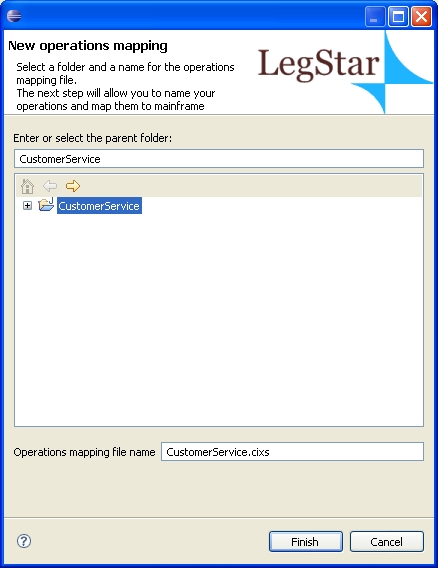
The first stage is to perform a mapping between the target mainframe program and a Java side operation. This is option LegStar->New operations mapping… On the first page you select a name and location for the mapping file. Operations mapping files are XML files with the cixs extension.
Clicking on Finish creates the operations mapping file and then opens up a special editor associated with files with cixs extension:
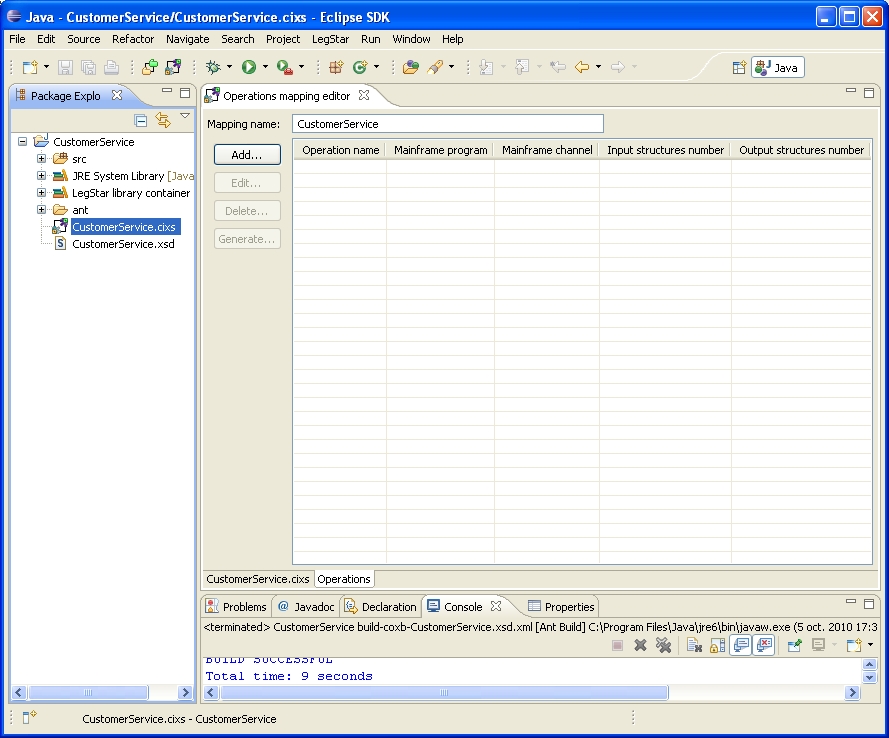
Click on the add button to start the operations mapping dialog:

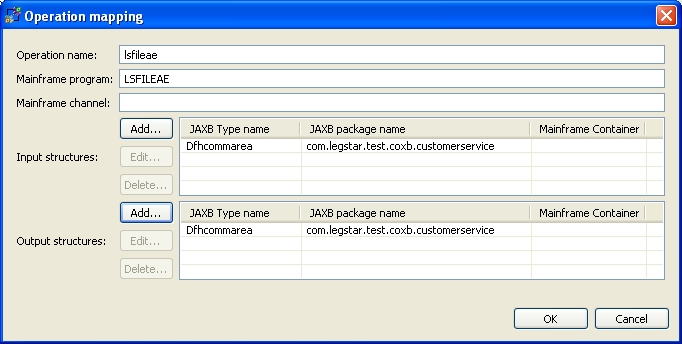
Type in an operation name and then enter the target mainframe program name. This must correspond to an actual mainframe program.
The next step is to specify input and output structures. You will have to use the add button again. You are then presented with the JAXB classes that you generated previously:
The target LSFILEAE CICS program is commarea-driven, there is a single input and a single output which both happen to be described by the same COBOL structure. So all we have to do is to select Dfhcommarea both for input and output.
This dialog allows you to specify a different input and output structures if needed. It also allows you to specify more than one input and more than one output as it would be the case for a target container-driven program (using CICS channel/containers) for instance.
Back on the editor, you can now click on the generate button and should see the following dialog:
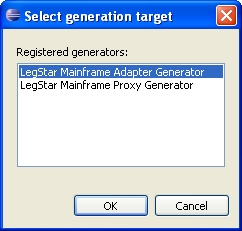
The operations mapping editor can be used with different kinds of generators, which are registered dynamically on your machine. Depending on your configuration, you might have more than one possible generation target. In our case, we want to generate a Mainframe Adapter. When you select that target and click the OK button you get this final dialog:
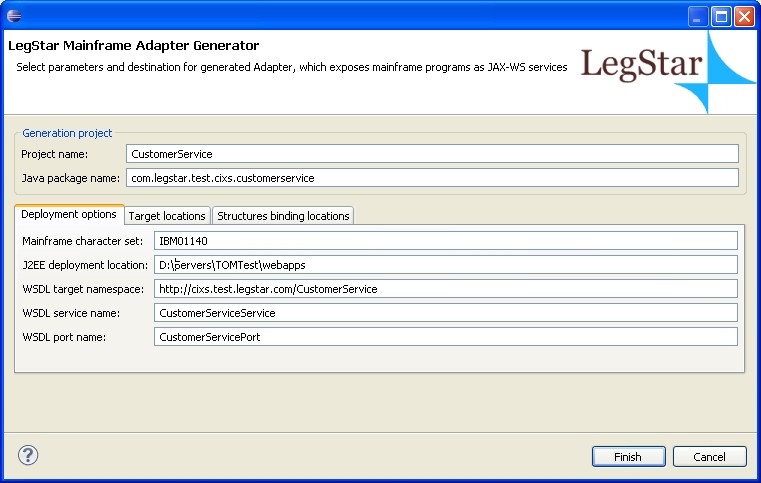
The generation process needs to create various artifacts, including Java classes that implement a JAX-WS endpoint bundled in a J2EE war file. This dialog allows you to select the target locations and other options. Most of these options have default values derived from your preferences. You can change the proposed parameters as you see fit.
Again, the Finish button creates an ant script, which actually generates the artifacts. The ant script has a name similar to build-jaxws-j2c-CustomerService.xml.
Besides the JAX-WS java classes, you will also find ant scripts that were generated to help you with deploying your endpoint. build-jar.xml bundles the classes in a jar archive that you could deploy to AXIS2 for instance. build-war.xml bundles a war file suitable for Sun's JAX-WS RI (Metro).
Once deployed, you can use the Web Service with any SOAP client such as soapUI.
In this use case we will give a CICS program access to a Web Service (You can also access a POJO in a similar fashion). The target Web service will be the LIVE Search API.
Start by creating a new standard Java Eclipse Project named LIVESearch. It is important that the project be of a Java nature.
The process starts by mapping XML schema types, from the target Web Service WSDL, to COBOL data items. This is option LegStar->New structures mapping…
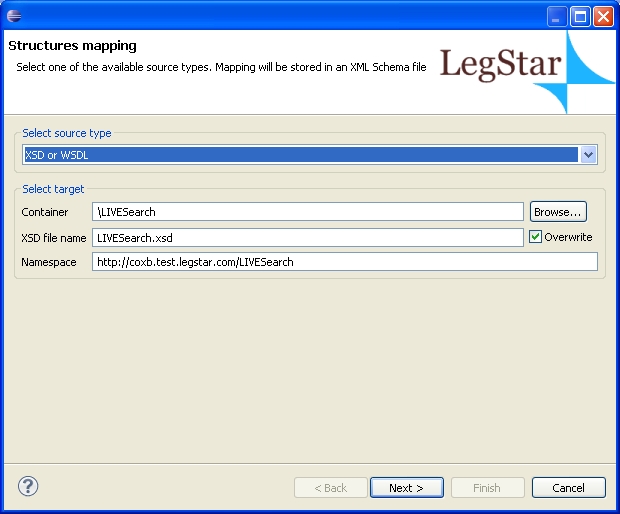
In this use case we select the XSD or WSDL source type since our starting point is a WSDL. As a result, the next page will allow you to select a file from your file system or to fetch it directly from the internet, which we do here by typing the URL for the Microsoft LIVE Web Service: http://soap.search.msn.com/webservices.asmx?wsdl and clicking on the go button:
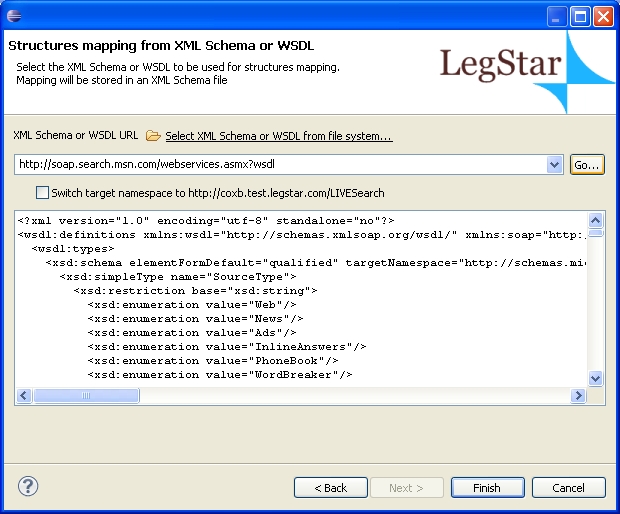
At this stage, we are ready to click on the finish button and then edit the generated mapping XML Schema:
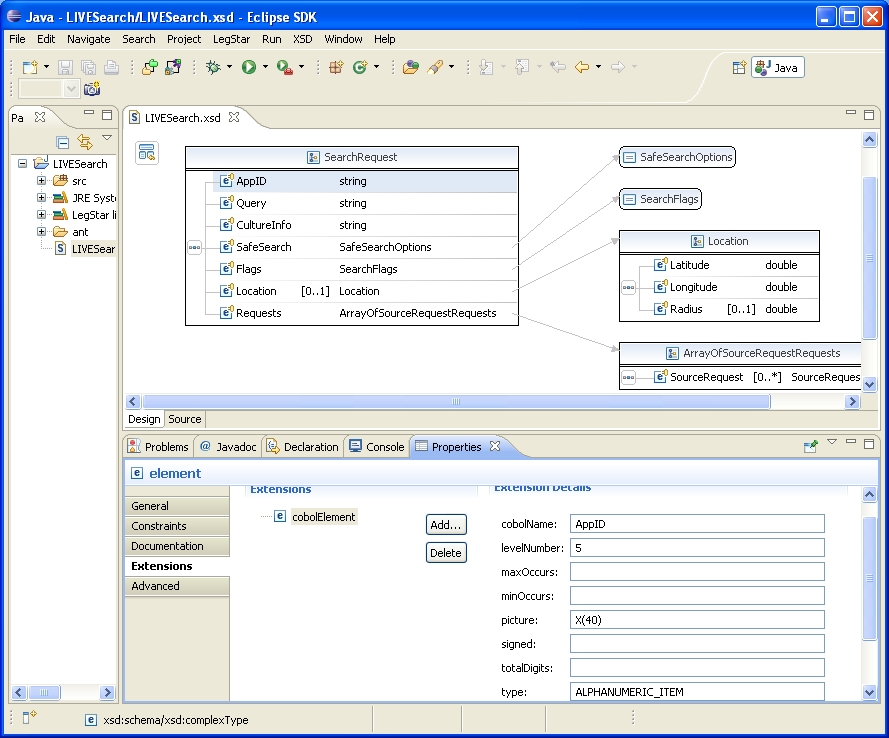
If you have the Eclipse XML Schema Editor installed, you can open the Properties view and select the extensions element to show and edit the COBOL attributes..
Since we started from a WSDL, a certain number of default COBOL data attributes were assigned. For instance, all character strings are 32 characters long. While this might be an acceptable default, it is not always the case. In our situation, the application ID (AppID in the SearchRequest complex type) must be 40 characters long. We need to change the COBOL picture from X(32) to X(40).
The wizard is started from the package explorer, by right clicking on a previously generated XML Schema and then selecting LegStar->Generate Transformers:

In this case, the root structures we are interested in are Search and SearchResponse, which are the wrapper elements expected and produced by the target Web Service. We select them both.
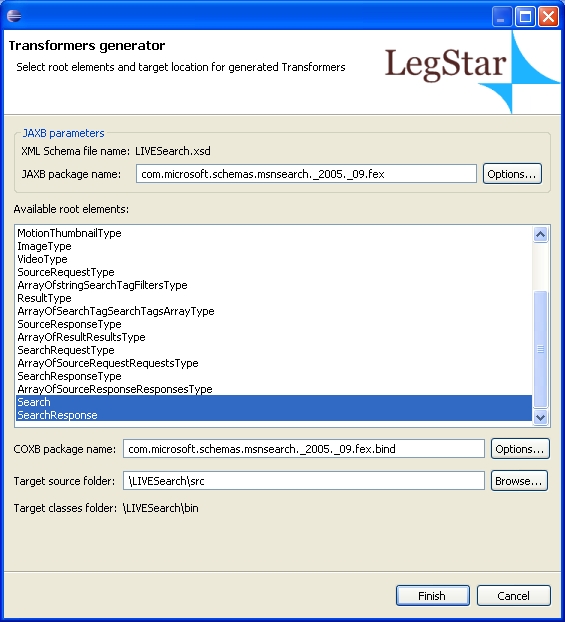
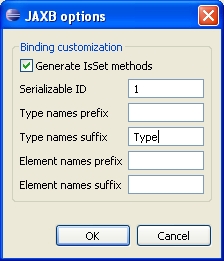
Because Microsoft uses the same names for both Elements and Complex Types, JAXB may complain about name conflicts. To avoid this, you can customize JAXB using the upper options button and specify that all Complex Types should be suffixed with characters "Type":
After you click finish, two Java packages are created, one for JAXB classes with COBOL annotations and one for the optimized Transformers classes.
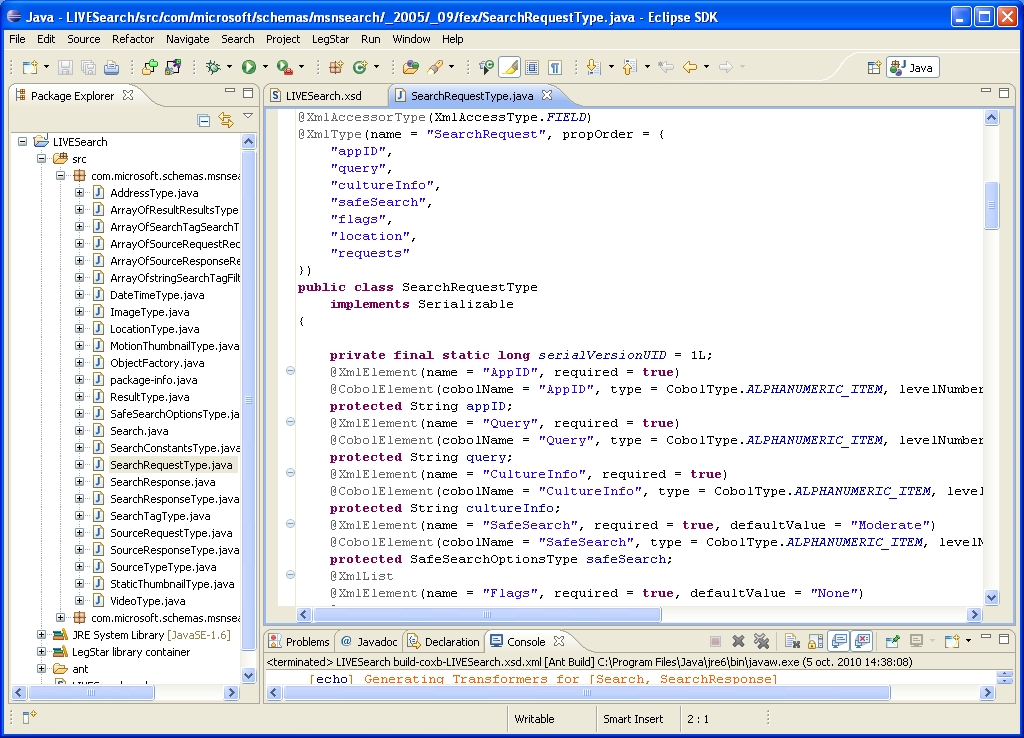
The Using generated tranformers section gives examples of code you could write to run Transformers.
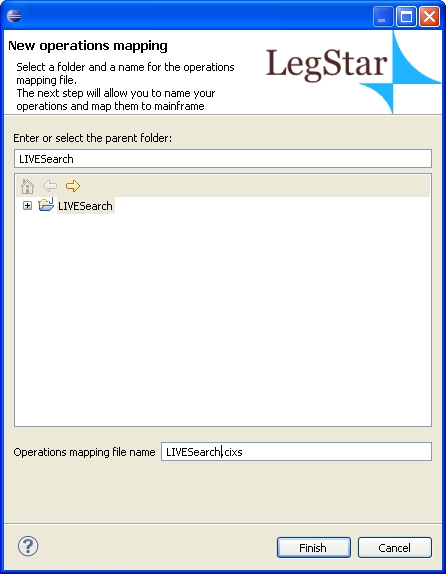
The last step is also similar to the previous use case. We start by creating a mapping to the Web Service operation using the LegStar->New operations mapping… option:
We now add an operation with the following characteristics:
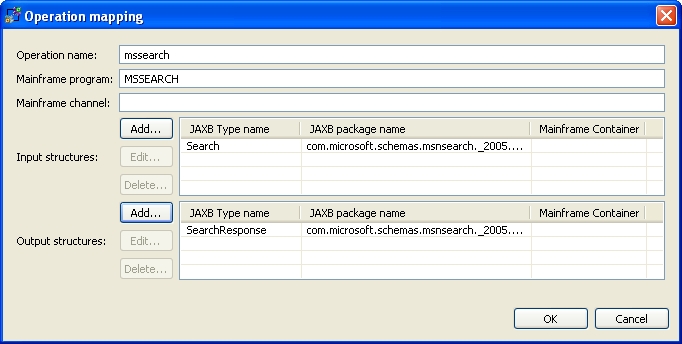
The mainframe program in this case is a sample COBOL CICS program that will be generated with the name that you specify here.
Once you are back on the operations mapping editor, you can click on generate. You can now select the mainframe proxy option:
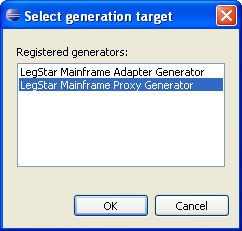
The generator dialog will ask you for the target Web Service runtime characteristics. This is needed to allow the proxy to address the target Web Service at runtime. You can query these parameters from the WSDL again by entering the URL and clicking on go. If the target WSDL has more than one service or port, you will have to select one:
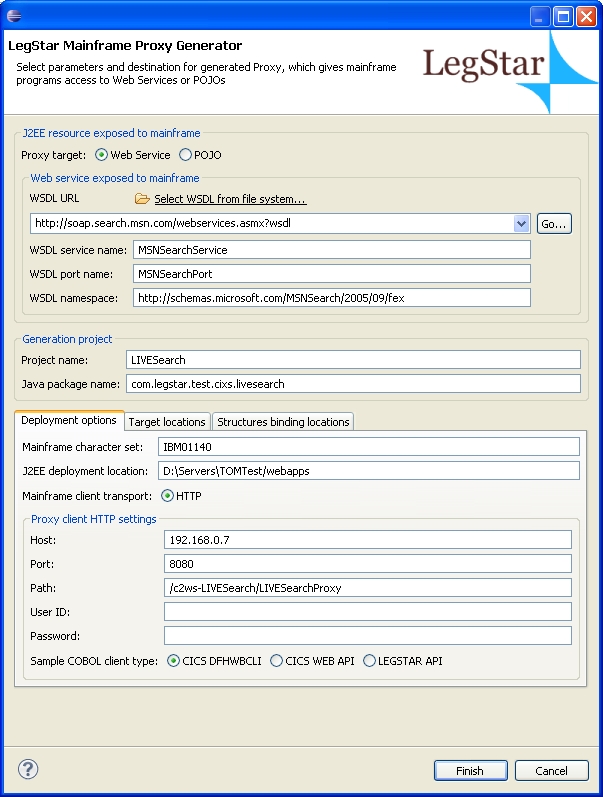
Clicking the finish button will create various artifacts. The Mainframe proxy is Servlet to be deployed in a J2EE container. The implementation uses Sun's JAX-WS RI (Metro) as a Web Service client. The build-war.xml ant file that is generated allows you to bundle the servlet ready for deployment.
The generator also creates a sample COBOL program that behaves as an HTTP client. The search structure shows up in the working storage section:
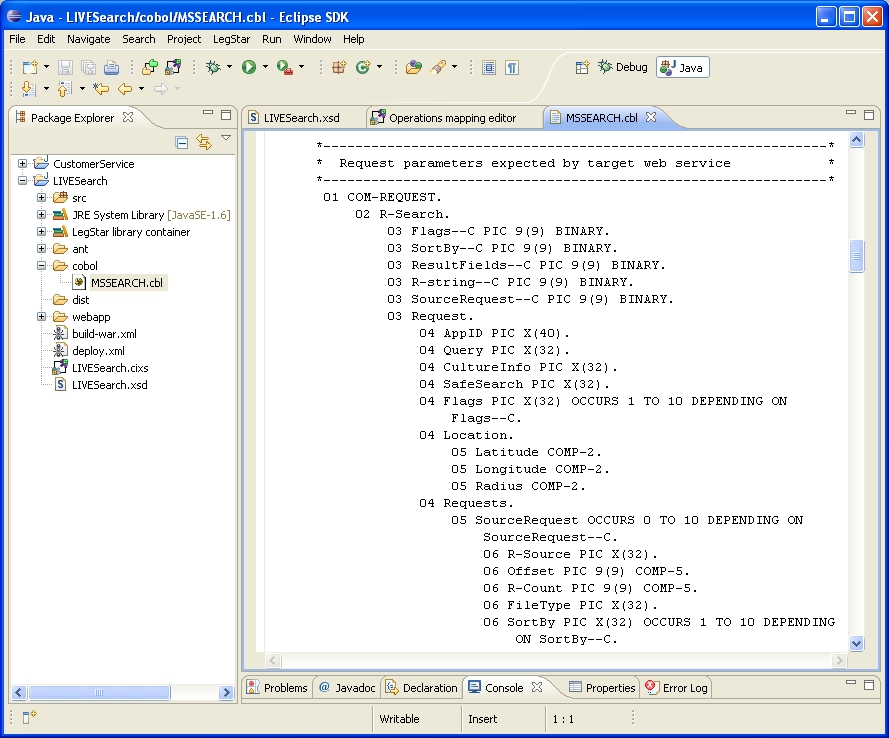
The sample COBOL source contains TODO comments to help you locate where you should set values for the search request and where you can display the results. The LIVE search service requires a developer ID that you can get for free and enter in the AppID field.
This is an example of code to set the search structures properly:
           MOVE ZERO TO Flags--C OF COM-REQUEST.
           MOVE ZERO TO SortBy--C OF COM-REQUEST.
           MOVE ZERO TO ResultFields--C OF COM-REQUEST.
           MOVE ZERO TO R-string--C OF COM-REQUEST.
           MOVE 1 TO SourceRequest--C OF COM-REQUEST.
      *  You should specify your own Microsoft LIVE application ID
           MOVE '5588C3ACE949317B3ECAADDQ908611BDF5D8D5ZA'
             TO AppID OF COM-REQUEST.
           MOVE 'Mainframe' TO Query OF COM-REQUEST.
           MOVE 'en-US' TO CultureInfo OF COM-REQUEST.
           MOVE 'Moderate' to SafeSearch OF COM-REQUEST.
           MOVE ZERO TO Latitude OF COM-REQUEST.
           MOVE ZERO TO Longitude OF COM-REQUEST.
           MOVE ZERO TO Radius OF COM-REQUEST.
           MOVE 'Web' TO R-Source OF COM-REQUEST(1).
           MOVE ZERO TO Offset OF COM-REQUEST(1).
           MOVE 1 TO R-Count OF COM-REQUEST(1).
           MOVE SPACES TO FileType OF COM-REQUEST(1).
And these are lines to display the result:
           STRING 'INVOKE-SERVICE success. First hit is '
                  DELIMITED BY SIZE
                  Description OF COM-REPLY(1, 1)
                  DELIMITED BY SIZE
                  INTO ERROR-MESSAGE.
           EXEC CICS SEND TEXT FROM(ERROR-MESSAGE) FREEKB END-EXEC.
           DISPLAY 'Response data length=' WBCLI-RESPONSE-BODY-LEN.

           DISPLAY 'SourceResponse--C ='
                    SourceResponse--C OF COM-REPLY.
           DISPLAY 'R-Source(1)=' R-Source OF COM-REPLY(1).
           DISPLAY 'Total(1)=' Total OF COM-REPLY(1).
           DISPLAY 'R-Title(1, 1)=' R-Title OF COM-REPLY(1, 1).
           DISPLAY 'Description(1, 1)='
                    Description OF COM-REPLY(1, 1).
After you add these lines of code, you should be able to upload the source onto your mainframe and get it compiled and defined to your CICS region. Please note that this program calls the CICS DFHWBCLI program defined in the CICS standard DFHWEB group. Alternatively, LegStar supports the new EXEC CICS WEB API or even supports older version of CICS with its own HTTP library.